Here is how to make simple willow trees;
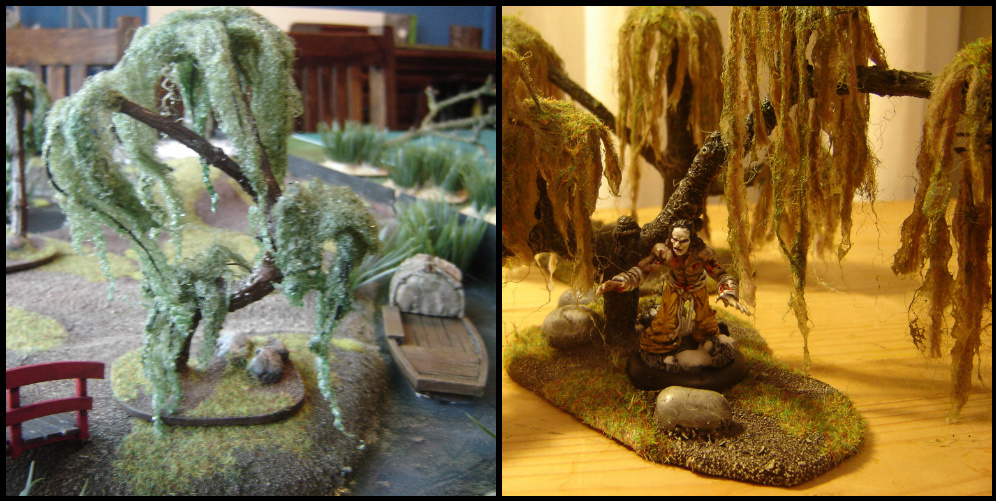
The one on the left uses a similar technique with one strand of wire per drop, and woodland scenics polyfibre, the one on the right uses the frame techniques shown here and cheap wool.
Materials, Tools and Build time
Materials (per tree);

- A gnarled and knobbly twig at least 1cm in diameter at the base, between 6-9 cm high (The more twisted and knobbly the better).
- A small piece of flat wood for a base (I use old coasters from a second hand shop, they are usually cheap and cut to size easily, and often have cork on one surface which is good for sculpting texture).
- 60-80cm of metal wire 0.5mm diameter (florists wire is best as it has a green papery coating which holds paint well, but any wire will do).
- Some fishtank/ornamental pebbles (for weighting).
- 100-200cm of Coarse wool in your choice of colour (you could use woodland scenics polyfibre as I did with my initial set, but that’s about 4x the cost of the wool)
Tools;
- Pin Vice drill & 1mm drill bit
- Flat Saw
- Pva glue and Superglue
Build Time;
Not including drying time about half an hour per tree. Including drying time, well that’s a long time!
Method
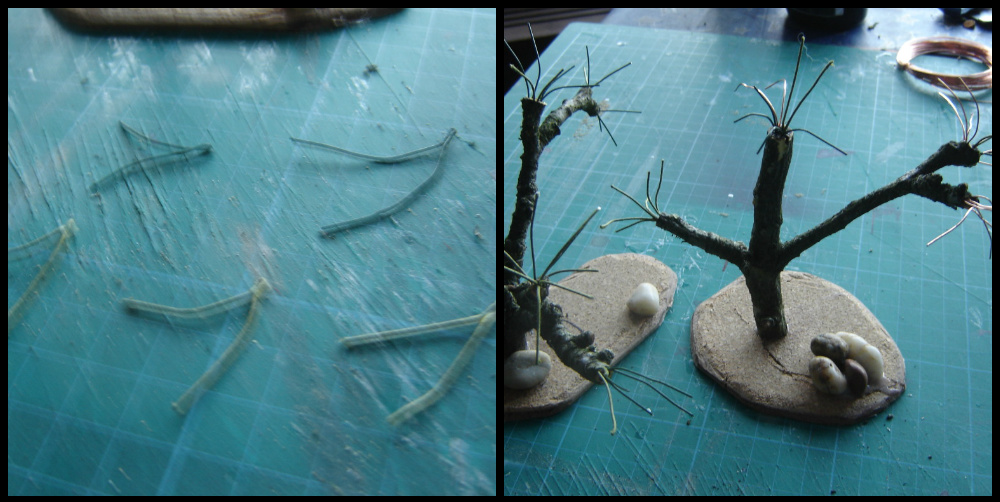
1. Go find your twigs, you’ll want ones from a fork in a branch so they split into at least two sections, and have a few other bits sticking out for ‘branches’. Saw a flat edge on the largest part of the branch near the tree- this will form your Trunk. Then saw flat edges onto all the ends of the ‘branches’ (the sections you want to put foliage on.) Cut your small pieces of wood to shape, and pin your tree to them with a piece of wire, glue it down using PVA glue- use a small amount of pebbles around the base of each tree to provide ballast so they don’t fall over constantly. leave this to dry for a few hours.

2. Once its solid on the base use the pin vice to drill 2-3 holes into the end of each ‘branch’ be careful here, dependant of the type of tree you're using the wood may split (from my garden - Elderberry=good, Apple=bad) Cut the metal wire into rough 90-120mm sections, then fold these in half (it doesn’t have to be accurate) use pliers to squeeze the folds as tight as possible. Glue one or two (what you can fit basically) of these pieces of wire into each hole using super glue and leave to dry. Once dry shape the wire to form small round canopies for your foliage to drape off, the photo below left shows you vaguely how but its quite easy to just go with the flow.
3. Coat the entire tree in a thick layer of PVA glue or spray varnish, this will stop all the bark coming off and removing all that nice texture, this is a good point to add the sand to the base as well, making sure you leave the trunk and rocks uncovered. That should dry in about 2 hours, then spray the whole thing black. Paint the trunk to taste, there are lots of ‘Weeping’ trees in Japan, not just willows so you will have to reference the tree of your choice to get the bark colour right, luckily the texture of the twigs means drybrushing works pretty well:) The wires need a basic coat of paint as similar to the colour of your coarse wool as possible.

4. This is the only vaguely difficult (and incredibly messy) part of the construction, take your wool and cut it into varying short lengths (depends on how tall your tree is). Fill a bowl with a mix of 1 part PVA glue to 2 parts water. Dunk the lengths of wool into the mix then drape them over the wire guides, going over the round bit and falling off either side, they should overhang plenty, almost to touching the floor but its to your taste really. Repeat this process over the top of each frame crossing over and changing the direction each time. This is going to run and drip everywhere so do it on a wipe clean surface. let that dry, I’d suggest overnight if you aren’t in a rush, once its stiffened up you can drybrush the wool with a different shade to add depth, (possibly add some strategic flock) then finish off the base and you’re done:)

And there you have it, a great little tutorial from Mick 'Greeny', simple and very effective.
Thanks for reading and thanks to Mick for letting us use this, if you'd like to see how these trees fit in with the rest of his work and for some more oriental terrain inspiration have a look here.